
This guide explains how to distribute one purchase order line item's received quantity across multiple storage locations using the Split-Storage Locations feature.
Instructions
-
Open the receiving screen. Go to View > Receiving, and choose the PO Number you will be receiving.
-
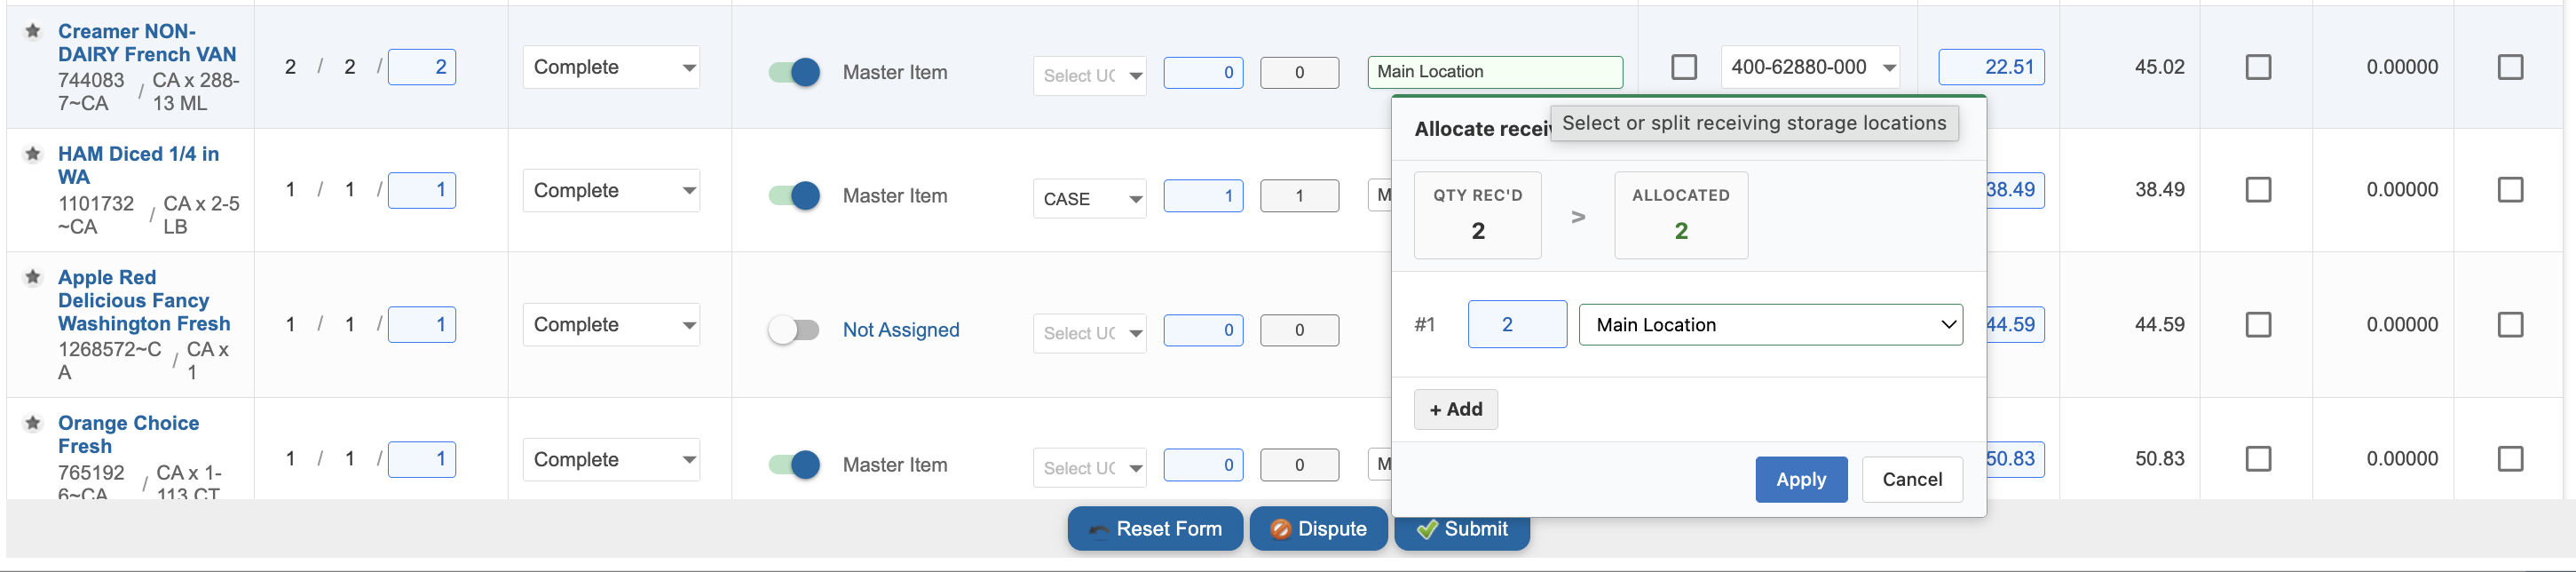
Open split-location settings. Find the item you want to allocate, then click its Storage Location label.
-
Add storage locations. In the popup, select + Add to create another row. Choose a storage location from each row's dropdown.
-
Enter quantities. Enter the quantity assigned to each location. Whole numbers and decimal values are supported. Use the mouse wheel or keyboard arrow keys to adjust amounts quickly.
-
Apply the allocation. Confirm that the sum of all location quantities equals the full received quantity, then select Apply.
Important: The split quantities must equal the total line-item quantity. If they do not balance, the system will prevent you from applying the changes. Clicking outside the popup closes it without saving.
Review and update split locations
-
Items assigned to multiple locations display the primary location followed by a +n badge, such as Dry Storage +2.

-
To edit an allocation, click the storage location label again, update the locations or quantities, rebalance the total, and select Apply.
-
To remove a split, delete the additional location rows, assign the full quantity to the remaining location, and select Apply.
-
The global Change All storage-location control skips items that already have split locations, protecting those allocations from accidental changes.